Building a NAS with OpenBSD
Over a recent long weekend, I've decided to build a small NAS for home use, mainly to have some of my data backed up and to have an archive of old stuff I don't need all the time. Both of my Laptops have 256 GB SSDs, and while that's usually enough, it's good to have some extra headroom sitting around.
The idea was to:
- Have a place to backup my stuff
- Have a machine that can do BitTorrent downloads on its own
- Have a machine that allows my to access big files from multiple other PCs
- Have a machine that works as a local git server
The Hardware
- Giada N70E-DR Motherboard - Mini-ITX with an Intel Celeron 1037U, 1.8 GHz x64 Dual Core
- 8 GB RAM, Kingston KVR16LS11/8
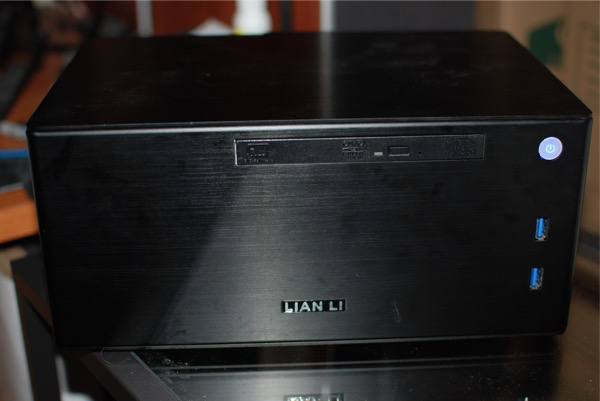
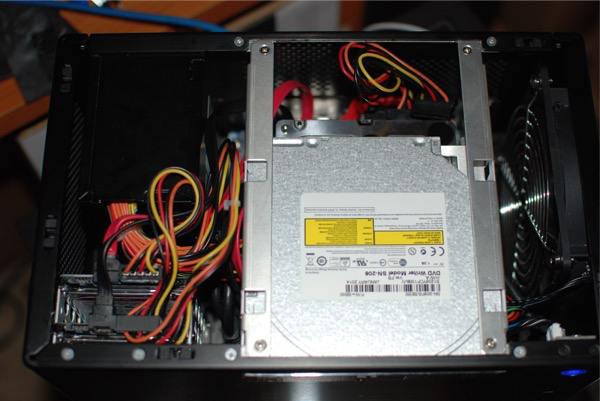
- Lian-Li PC-Q09FNB case
- Samsung Slim DVD-RW drive
- 128 GB mSata SSD, AData ASP310S3-128GM-C (Boot/OS Drive)
- 2x 1 TB 2.5" WD Red WD10JFCX
- 1x 3 TB 3.5" WD Red WD30EFRX
I bought the motherboard and case a few years ago for something else, so I think better options are available now.
The desired setup:
- Use the 128 GB SSD as the boot drive - because it's mSATA it fits directly on the motherboard, and doesn't take up space for mounting drives
- Use the two 2.5" 1 TB drives as a RAID 1 - that way, I'm protected against hard drive failure. Do note that RAID 1 is more an availability than a safety thing because viruses or accidential deletion of files isn't something a RAID can help with
- Use the one 3.5" 3 TB drive as a big store for non-critical stuff, like backups of my Steam games or temporary BitTorrent files
The case doesn't have much space for drives, even though the motherboard has plenty of S-ATA ports.
For the operating system, I went with OpenBSD 5.7 x64. I prefer OpenBSDs very minimalistic approach of offering a tiny base system, and then allowing me to add exactly the pieces of software that I need. I'm not going to give a full rundown of how OpenBSD works, because if you're really interested you should definitely read Absolute OpenBSD.
Basic System Setup
Do setup a user during setup - in my case, I called him User.
My 128 GB SSD is partitioned as follows:
#                size           offset  fstype [fsize bsize  cpg]
  a:             2.0G               64  4.2BSD   2048 16384    1 # /
  b:             8.2G          4209024    swap                   # none
  c:           119.2G                0  unused
  d:             4.0G         21398592  4.2BSD   2048 16384    1 # /tmp
  e:            15.0G         29800544  4.2BSD   2048 16384    1 # /var
  f:             8.0G         61255840  4.2BSD   2048 16384    1 # /usr
  g:             2.0G         78027680  4.2BSD   2048 16384    1 # /usr/X11R6
  h:            15.0G         82220640  4.2BSD   2048 16384    1 # /usr/local
  i:             3.0G        113675936  4.2BSD   2048 16384    1 # /usr/src
  j:             3.0G        119957344  4.2BSD   2048 16384    1 # /usr/obj
  k:            59.0G        126238752  4.2BSD   2048 16384    1 # /home
The best setup varies on preference of course, in my case I stuck mostly to the OpenBSD defaults and only gave /usr/src and /usr/obj some extra space.
After the system boots up for the first time, add powerdown=YES to /etc/rc.shutdown. This turns off the machine when shutdown -h now is called. Do note that halt doesn't seem to respect that, and needs to be invoked with halt -p. To my delight, pushing the power button on the case turns off the machine properly - hooray for working ACPI support!
The first thing before installing any software should be to follow -stable, recompiling the kernel, userland, and xenocara.
# cd /usr
# export CVSROOT=anoncvs@anoncvs.usa.openbsd.org:/cvs
# cvs -d$CVSROOT checkout -rOPENBSD_5_7 -P src ports xenocara

# cd /usr/src/sys/arch/amd64/conf
# config GENERIC.MP
# cd ../compile/GENERIC.MP
# make clean && make
# make install
# reboot

# rm -rf /usr/obj/*
# cd /usr/src
# make obj
# cd /usr/src/etc && env DESTDIR=/ make distrib-dirs
# cd /usr/src
# make build
# cd /usr/xenocara
# rm -rf /usr/xobj/*
# make bootstrap
# make obj
# make build
# reboot
This takes a long time, over an hour on this machine. After that, it's time to do package setup
Add FETCH_PACKAGES=yes to /etc/mk.conf, and export PKG_PATH=ftp://ftp5.usa.openbsd.org/pub/OpenBSD/5.7/packages/amd64/to begin installing packages.
The OpenBSD packages and ports system is a bit interesting, because it seems that packages are built only once when a new OpenBSD version is released, and then never updated. You have to manually compile newer versions of software. That's not that big of a deal, because with FETCH_PACKAGES enabled, the system will fetch packages if they are still the correct version and only build ports where needed.
Setting up a data drives, incl. RAID 1
I decided that my data drives should live under /var/netshared, so I created this and two subdirectories - data and glacier. I will set permissions later.
I have 2x 1 TB hard drives, from which I want to build a RAID 1. First, setup disklabels for both drives (disklabel -E sd0, then sd1), making sure that the partition type is RAID instead of the default 4.2BSD.
OpenBSD area: 0-1953525168; size: 931.5G; free: 0.0G
#                size           offset  fstype [fsize bsize  cpg]
  a:           931.5G                0    RAID
  c:           931.5G                0  unused
Then, run bioctl -c 1 -l sd0a,sd1a softraid0 to create the RAID. The -c 1 flag sets the RAID level (RAID 1 = mirroring), and -l (lowercase L) is a list of partitions that form the raid. The softraid0 at the end is an internal identifier - it must start with softraid. bioctl will then create a new device that will appear like a hard drive and can be used as such.
The actual device will be something like /dev/sd4. You need to run disklabel on the new device to create a partition, this time of the usual 4.2BSD type. In order to add it to /etc/fstab, you need to get the duid, which you can get by running disklabel sd4:
# /dev/rsd4c:
type: SCSI
disk: SCSI disk
label: SR RAID 1
duid: cc029b4fe2ac54dd
(I do note that using duids in fstab is optional, but I highly recommend it as it makes you independent of device name changes as long as the actual drive is the same)
Remember to run newfs /dev/sd4a to create a file system. OpenBSD will pick FFS for drives smaller than 1 TB, and FFS2 for drives bigger than 1 TB. Check man newfs for options.
Here's how my fstab looks:
e8bd5e30aba4f036.b none swap sw
e8bd5e30aba4f036.a / ffs rw 1 1
e8bd5e30aba4f036.k /home ffs rw,nodev,nosuid 1 2
e8bd5e30aba4f036.d /tmp ffs rw,nodev,nosuid 1 2
e8bd5e30aba4f036.f /usr ffs rw,nodev 1 2
e8bd5e30aba4f036.g /usr/X11R6 ffs rw,nodev 1 2
e8bd5e30aba4f036.h /usr/local ffs rw,nodev 1 2
e8bd5e30aba4f036.j /usr/obj ffs rw,nodev,nosuid 1 2
e8bd5e30aba4f036.i /usr/src ffs rw,nodev,nosuid 1 2
e8bd5e30aba4f036.e /var ffs rw,nodev,nosuid 1 2
cc029b4fe2ac54dd.a /var/netshared/data ffs rw,nodev,nosuid,noexec,noatime 1 2
f4540651dabd448d.a /var/netshared/glacier ffs rw,nodev,nosuid,noexec,noatime 1 2
Notice the nosuid,noexec,noatime,nodev flags on the two data drives. This is just some precaution against malicious files, and noatime is just to reduce disk wear by a tiny fraction. Check the manpage of mount for more information.
Setting up a user
During OpenBSD Setup, a user should've been setup. If you decided not to, use useradd to create one now.
Create a group for access to the shared directories: groupadd netshared
Add the user to that group: user mod -G netshared User
Change owner and permissions:
chown -R User:netshared /var/netshared/*
chmod -R 0770 /var/netshared/*
Note that the execution-bit is required to traverse directories, so chmod 0660 wouldn't work as a permission mask. Since the file system is mounted noexec, it doesn't matter anyways.
Installing Samba
Start by installing the samba port:
# cd /usr/ports/net/samba
# make install
Then, configure samba (thanks Pierre-Philipp Braun for the tip with sed):
cd /etc/samba/
mv smb.conf smb.conf.dist
sed '/^#/d; /^;/d; /^$/d;' smb.conf.dist > smb.conf
vi smb.conf
Here's my smb.conf:
[global]
   workgroup = WORKGROUP
   server string = Samba Server
   security = user
   load printers = no
   log file = /var/log/samba/smbd.%m
   max log size = 50
   dns proxy = no
   printing = BSD
   unix extensions = no
   allow insecure wide links = no
[data]
   path = /var/netshared/data
   valid users = User
   writable = yes
   printable = no
[glacier]
   path = /var/netshared/glacier
   valid users = User
   writable = yes
   printable = no
If you want to give access to groups instead of individual users, prefix with an @-sign: valid users = @netshared
The manpage - man smb.conf - is very extensive. If you want to finetune permissions, take the time to browse through it.
To start samba on system startup, add this to /etc/rc.conf.local:
pkg_scripts="samba"
samba_flags=""
This should be it - start samba through /etc/rc.d/samba start and try accessing your new file shares!
Using the server as a git server
This isn't really a NAS-specific, but git specific. If you want to install git on the server, cd /usr/ports/devel/git and make install.
Create or clone a bare repository on the NAS:
cd /var/netshared/data
mkdir myrepo.git
cd myrepo.git
git init --bare
Or clone an existing repository as a bare clone:
cd /var/netshared/data
git clone --bare https://github.com/mstum/faml.git
Then, on your machines, clone from that repository:git clone \\nas\data\faml.git
This will automatically set up an origin remote on your local clone, so any changes you make on your laptop can be pushed to the server through git push.
Setting up a BitTorrent client
Install the port of transmission:
cd /usr/ports/net/transmission
make install
This will automatically create a _transmission user - add it to the netshared group:user mod -G netshared _transmission
Create folders for BitTorrent:
mkdir /var/netshared/glacier/BitTorrent
mkdir /var/netshared/glacier/BitTorrent/incomplete
mkdir /var/netshared/glacier/BitTorrent/complete
mkdir /var/netshared/glacier/BitTorrent/watch
chown -R User:netshared /var/netshared/glacier/BitTorrent
Edit the /var/transmission/.config/transmission-daemon/settings.json file (if it doesn't exist, run /etc/rc.d/transmission-daemon start and then stop it - changes to the file will be lost if you edit it while the daemon is running)
Important settings/changes:
"download-dir": "/var/netshared/glacier/BitTorrent/complete",
"incomplete-dir": "/var/netshared/glacier/BitTorrent/incomplete",
"incomplete-dir-enabled": true,
"rpc-whitelist": "127.0.0.1,192.168.1.*",
"rpc-whitelist-enabled": true,
"watch-dir": "/var/netshared/glacier/BitTorrent/watch",
"watch-dir-enabled": true
These settings make it so that any .torrent you drop into the watch directory immediately gets added and started. Downloads go into the incomplete directory while they are downloading, and are then moved to the complete directory afterwards.
rpc-whitelist is a comma-separated list of IPs that can remotely control transmission, so this should be limited to your local network. You can access the web UI on http://nas:9091/transmission/web which is pretty neat.
To auto-start transmission, edit your /etc/rc.conf.local and add transmission_daemon to the pkg_scripts. I recommend starting it before samba, so that samba gets shutdown before transmission. (OpenBSD stops services in the reverse order of startup).
Keeping up to date
Keeping OpenBSD up to date is described in the following -stable link above. Basically, CVS update all of src, ports, xenocara if needed, then recompile and reboot.
To check if your ports are up to date, you can run /usr/ports/infrastructure/bin/out-of-date, then cd into any ports and run make update.
Note that if you've installed a package, it's safe to update it through make update in the ports directory - packages are really just precompiled ports, no "magic".
Closing Remarks
This was really just a howto of how setup my NAS currently, aimed at people that already know OpenBSD. If you're curious about a *NIX server and don't mind spending some time to learn the system. I'm highly pleased with OpenBSD. The system is minimalist - there are not many moving parts by default - and really invites to understand stuff properly.
If you have a more sophisticated NAS setup, you may want to look at FreeNAS as well. Do note that the 8 GB minimum RAM requirement is not a joke - FreeNAS will install and seemingly run on 4 or even 2 GB, but random data loss is almost guaranteed to occur.
[…] been about 18 Months since I build a NAS for my own use and over time, my requirements have changed drastically. For one, I went with Windows instead of […]